First of all, hello to everyone. I've read loads of threads after my brother turned me on to your site, and it all looks great. I love building things, especially when they might be useful. I'm putting a small sailboat on hold to do the hardware side of a book scanner for my brother.
I'm in Texas, and he lives in Tennessee right now, but he moves around regularly, and he'd like a scanner that is durable enough to use for days on end when he's scanning a library, and portable enough to pack up and take to a friends house, community library, across the street, around the world.
The simplicity and durability of the New Standard have me thinking that's probably the way to go. My plan right now is to make it easy to take apart and put back together, with bonus points if it can all be fit in a USPS flat rate box (size options here), probably the medium, at 13-5/8" x 11-7/8" x 3-3/8".
I've bought a piece of 1/2" birch plywood, and this weekend, I'll be making a cardboard mockup. I believe I can use the clamp idea that allows the right side of the cradle to move for both sides, to make breakdown and assembly easier, and we're considering a platen that holds the cameras to keep the shots aligned*. The lights would be attached to a bracket very similar to the new standard, possibly in more smaller pieces to fit in the box. We liked the compactness of the book liberator, but the question of glare has brought us back to the new standard, with it's higher mounted lights. The platen would preferably be "free floating," as opposed to on a rail, as it seems you need the cradle to also be on a rail to make sure everything is aligned as you move through a thick book. The ply base will be the bottom of this scanner, I'm not planning on having the 2x4 box.
As to the camera, I realize any camera is better than no camera, and the canon a590 is the current preference, but as we browse craigslist and ebay, which list of cameras should we be choosing from? There's the SDM list, the CHDK list, and the (probably inclusive of the other two) libgphoto list. We intend to start with one camera and eventually get a second, and fire them both from a single switch. If the answer is "buy a 590 and get scanning," that's all I need.
I'm looking for any feedback on these ideas. I realize there are more portable solutions (camera, tripod, book) and more sturdy solutions (I really like the 80/20 aluminum builds) but I need to compromise on both.
*I'm curious if this is important. I imagine it's helpful in post processing if all the pages are in the exact same spot in the image. If not, the camera mounts can attach to the base
Semiportable build, and other beginner questions
Moderator: peterZ
-
Ryan_phx
- Posts: 63
- Joined: 29 Dec 2010, 14:51
- E-book readers owned: Nook, Kindle DX
- Number of books owned: 0
- Country: USA
- Location: Sandusky, OH
Re: Semiportable build, and other beginner questions
You might want to look at my build thread--it's not as small as you're trying to get, but it might give you some ideas. In particular, I found using door rollers for the cradle assembly works well, and they don't take up much space. I also think that, especially for a more portable build, 1/4" ply is sufficient for most parts of the cradle and the platen, although you might want 1/2" for the cradle base and to attach the platen to the vertical slides. After using mine for a while, I think that the 1/2" I used for my cradle and platen was overkill. My light rig is also a lot taller than it needs to be--I'm actually going to cut that down when I get some free time. I just wasn't sure how high the light rig needed to be, so I built in some flexibility. Now I know that, with my 4 Cree LED's, about 24" above the platen is fine. And for a portable rig, LEDs are definitely the way to go. I also like my PVC camera mounts and light stand, because I can put the smaller light stand pipe inside the larger camera mount pipes for storage. Takes less space, and the larger pipe makes the camera mounts very steady.
I'm using two Canon A480s, and they work great. I've got a single trigger to fire both simultaneously, and getting that all set up was really pretty easy. I had a configuration issue with CHDK, but that was only because I'd never used it before and didn't really know what I was doing.
On my scanner, I can see plenty of places where I could shave off some nonessential material, but even using a free-floating platen, I think you've got your work cut out for you trying to build one that is both sturdy and yet small enough for that medium USPS box. I'm not saying it can't be done, just that you'll have to be clever about some things.
I'm looking forward to seeing what you come up with!
-
TomHorsley
- Posts: 96
- Joined: 30 Jan 2011, 10:39
Re: Semiportable build, and other beginner questions
I did parts of my build using 3/4" conduit and ground wire clamps for a "tinker toy" like effect:
http://home.comcast.net/~tomhorsley/har ... anner.html
It occurs to me that lots more parts of the scanner could be built the same way, and lots of pieces of conduit and clamps to hold it together could collapse down to a fairly small bundle. The platen would probably be the biggest pain.
http://home.comcast.net/~tomhorsley/har ... anner.html
It occurs to me that lots more parts of the scanner could be built the same way, and lots of pieces of conduit and clamps to hold it together could collapse down to a fairly small bundle. The platen would probably be the biggest pain.
-
daniel_reetz

- Posts: 2812
- Joined: 03 Jun 2009, 13:56
- E-book readers owned: Used to have a PRS-500
- Number of books owned: 600
- Country: United States
- Contact:
Re: Semiportable build, and other beginner questions
To make a camera recommendation, can you tell us what size books you'll be scanning? There's a direct relationship between the size of the pages and the target DPI of your scans. Since you're starting with only one camera we have more flexibility in recommending things...
-
hg1027
Re: Semiportable build, and other beginner questions
The biggest books we have that we'd want to scan were about 9x12, and there's the limit of the cradle parts fitting in the box. If we can't expect decent scans over a certain size with an A480 or other basic camera, I can take that in to account when building. The main goal of scanning is to have some representation of the books available while traveling. I expect we'd need a better cam to expect reliable OCR and dumping to a Kindle.
-
hg1027
Re: Semiportable build, and other beginner questions
Some progress:
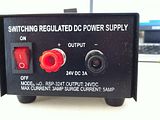
I bought a power supply for the LEDs:
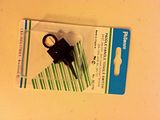
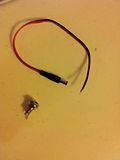
A switch, plug, and jack:
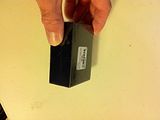
And a little box to put them in that will be mounted to the cradle base:
Also rough cut the wood, pics to come.
rant:
I spent an hour and a half at the local surplus electronics store. I had a great 18V 2A power supply that I carried around while looking for the switch and the box, only to be told it wasn't $15, it was $55. Then I dug up an old laptop power supply that would have been $5, but it was dead. Then, as it was 3:45 and I hadn't had lunch, I brought up an AC/AC power supply and the tester almost zapped him self. So I said fine, I'll just get the bench one for $20 and get the heck out of here. If I can find a nice wall wart or laptop power supply, fine, but this will have to do for testing.
/rant.
I bought a power supply for the LEDs:

A switch, plug, and jack:


And a little box to put them in that will be mounted to the cradle base:

Also rough cut the wood, pics to come.
rant:
I spent an hour and a half at the local surplus electronics store. I had a great 18V 2A power supply that I carried around while looking for the switch and the box, only to be told it wasn't $15, it was $55. Then I dug up an old laptop power supply that would have been $5, but it was dead. Then, as it was 3:45 and I hadn't had lunch, I brought up an AC/AC power supply and the tester almost zapped him self. So I said fine, I'll just get the bench one for $20 and get the heck out of here. If I can find a nice wall wart or laptop power supply, fine, but this will have to do for testing.
/rant.
-
hg1027
Re: Semiportable build, and other beginner questions
LEDs, buckpuck, and 24v 1.7A psu ordered.
Now to eat breakfast, finish cutting the wood for the cradle, cut wood for the plywood sailboat I've been building, order a new car stereo after 6 months of no cd player, and generally make the most of a Saturday.
Now to eat breakfast, finish cutting the wood for the cradle, cut wood for the plywood sailboat I've been building, order a new car stereo after 6 months of no cd player, and generally make the most of a Saturday.
-
daniel_reetz
- Posts: 2812
- Joined: 03 Jun 2009, 13:56
- E-book readers owned: Used to have a PRS-500
- Number of books owned: 600
- Country: United States
- Contact:
Re: Semiportable build, and other beginner questions
Congrats on your progress! It's nice to have a bench supply around anyway. Living in Los Angeles, I know all too well about the costs of things like that. If I have to spend two hours driving or digging to get a deal, it's no longer a deal, at all. Did you get the 1000MA buckpuck, or the 700?
Have a great weekend. I'm going to be traveling for the next week or so but I hope to be tracking progress here on the forums with my phone. Lots of great work going on.
Have a great weekend. I'm going to be traveling for the next week or so but I hope to be tracking progress here on the forums with my phone. Lots of great work going on.
-
hg1027
Re: Semiportable build, and other beginner questions
I got 4 of these and one of these, the 1000mA.
Daniel, I was really excited about your youtube/vimeo about the circuit that had the lights on at half with a full bright button. Did that use a buckpuck? If you have a chance, I'd appreciate a link to that video (i've scoured the forum looking for the link) and if it doesn't use a buckpuck, any advice on doing something similar with the buckpuck.
I just found a good post on another forum describing something similar here. Anyone who cares to comment on that design or related, welcome. I still think the ideal setting for using something like this is a darkened room (after dark most likely) with the only light coming from the LEDs so you have glare controlled. A beer and a bowl of crumb free snacks would complete the work station.
-
daniel_reetz
- Posts: 2812
- Joined: 03 Jun 2009, 13:56
- E-book readers owned: Used to have a PRS-500
- Number of books owned: 600
- Country: United States
- Contact:
Re: Semiportable build, and other beginner questions
Sorry, I am on a phone at the moment so it is tough to find things. The video is called LED Lighting for DIY Book Scanning or similar. The circuit is more complicated and less efficient than a buckpuck.
What you are going to need is a single-pole normally closed momentary switch and a resistor or potentiometer. Connect the switch between vref and ctl on your buckpuck. Put a resistor or potentiometer in series with the switch. The resistor will determine the half-on brightness, and when you press the switch (opening normally closed circuit), you will disconnect ctl from vref and your buckpuck will go on 100% since that is the default mode.
CTL pin ->ResistorOrPotentiometer-NCpushbuttonswitch->Vref pin