Lego-based single-camera paperback build

Built a scanner? Started to build a scanner? Record your progress here. Doesn't need to be a whole scanner - triggers and other parts are fine. Commercial scanners are fine too.

Moderator: peterZ

Post Reply
jgreely

Lego-based single-camera paperback build

Post by jgreely »

[Edit: added some rendered models to clarify the pictures. Built in Lego Digital Designer, edited in Bricksmith to add a phony baseplate and platen, and then rendered with LDView]

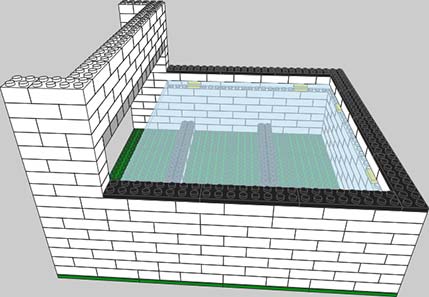
I have a large number of Japanese paperbacks that I want to OCR, roughly 4x6 and 5x7 inches. I had everything I needed except a platen and a design, and after browsing these forums for a while, I came up with both. Because my camera has manual focus and exposure controls (and remote-control software!), I wanted a design that kept the platen at a constant distance from the camera. There's still some tinkering to do, but I think it's going to work nicely.

Image

Here (3.6MB JPEG) is the raw output from the first test shot, done with just room lighting.

Materials:
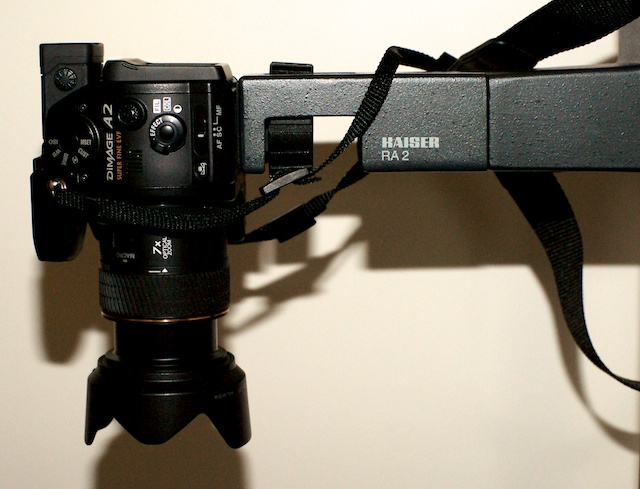
  • Minolta Dimage A2 8MP camera, Dimage Capture remote-control software, and AC-11 power adapter.
  • Kaiser copystand.
  • Speedotron Black Line 1205CX power pack, plus two each of 202VF color-corrected flash head with 7" reflector, 10-degree grid insert, and 8-foot light stand.
  • Wein wireless flash trigger and slave.
  • Abbyy Finereader Pro 9.0.
  • 32x32-post Lego baseplate and a whole bunch of Legos in various sizes and shapes.
  • 7.75x9.25-inch (roughly 25x30-post) sheet of 1/4-inch Acrylite GP for the platen.
  • a bunch of pennies.
  • several sheets of matte black construction paper.
  • two sheets of cardstock.
  • several sheets of packing foam.
  • tape.
Side view; the platen is simply sandwiched between layers of Legos. Note the extra Legos to position the assembly for a 4x6 book:
Image Image

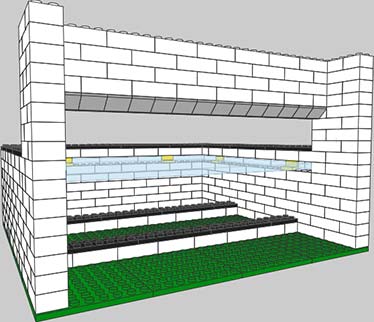
Back view, with a spacer column to position 4x6 books consistently:
Image Image

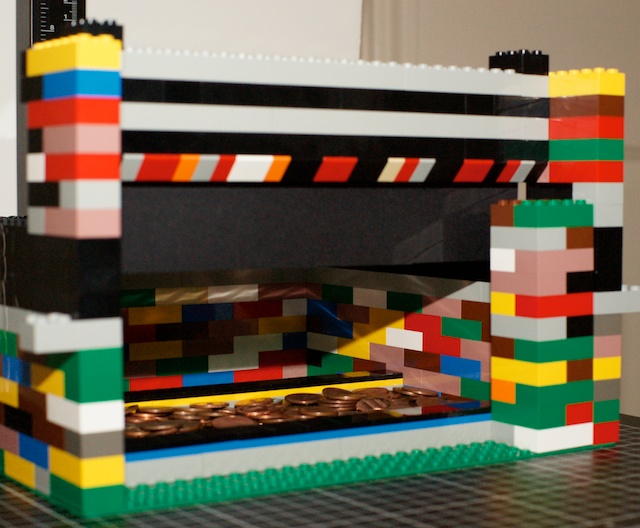
In use; construction paper is taped to the vertical riser to eliminate glare, and another sheet placed behind the page being scanned to significantly reduce bleed-through. The pennies add enough weight to the assembly so I can press the book up into the platen:
Image

Camera support (note the camera doesn't need to be in Macro mode):
Image

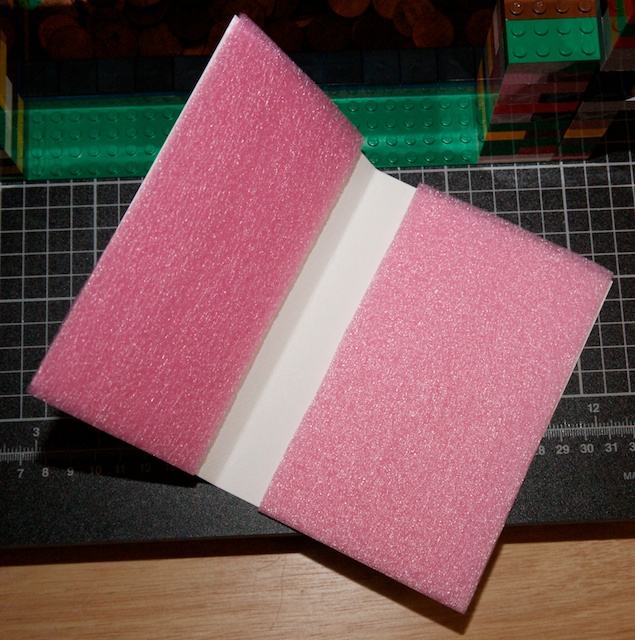
Cardstock-and-foam cradle to press the hand-held book up into the platen consistently.
Image

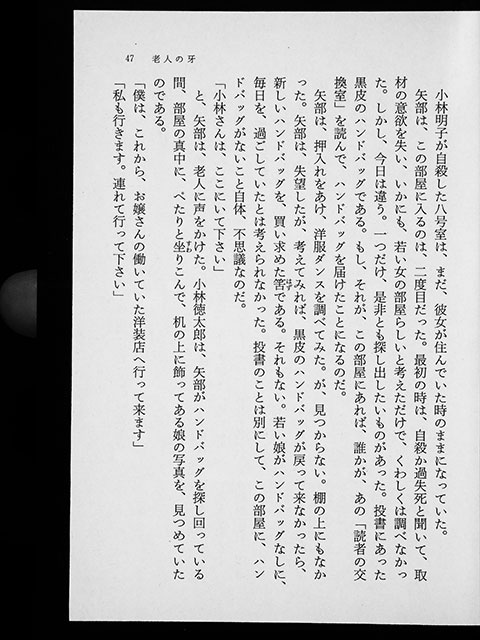
Cleaned-up detail from the test scan linked above:
Image

Without doing any cleanup on the test scan, Finereader was able to OCR it with only two single-character errors, plus about a dozen garbage characters added to short lines where it interpreted the noise in the low-contrast JPEG as ASCII. The camera can shoot RAW, the flash rig will provide crisp, even lighting, and doing a little bit of pre-processing before OCR will significantly improve the recognition rate and get rid of the noise. I know from experience that a 300dpi scan is adequate for Japanese in Finereader, and this setup will get ~600dpi for the 4x6 books and ~450 for the 5x7 ones, so it should work out nicely.

I tested the flash rig before I built the scanner, so I know it will fill the platen with crisp, even, glare-free light, but it's powerful enough to light a large room, and at its minimum setting (1/4 power, single channel, for an effective 37 watt-seconds per head), the reflectors have to be nearly six feet away from the platen to deliver only f/8 at ISO 64, with an exposure time of 1/500th seconds.

I'll be doing some real scans tonight. The target books are the murder mystery To Die in the Rain (4x6, page 5 was the test scan), Japanese Train Lunches (4x6, full-color photos), and My Youth with Ultraman (5x7, with B&W photos). I'll post some samples once they're done.

-j
Last edited by jgreely on 07 Apr 2011, 19:30, edited 3 times in total.
User avatar
jck57
Posts: 376
Joined: 23 Nov 2009, 15:21

Re: Lego-based single-camera paperback build

Post by jck57 »

Outstanding work! Just shows what you can do with imagination and common cents!
jgreely

Re: Lego-based single-camera paperback build

Post by jgreely »

First color sample with the flash rig hooked up, shot RAW and developed with default settings in Photoshop, with only a rotate and an auto-contrast applied before saving to JPEG:
Image

Full-resolution detail:
Image

-j
jgreely

Re: Lego-based single-camera paperback build

Post by jgreely »

[updated with a much better diagram and a parts list]

To improve on the pictures, here's what the platen assembly looks like in Lego Digital Designer (not exactly like mine...):

Image

The angled pieces protect the edge of the facing page from rubbing against the sharp bottom corner of the riser. The yellow spacers are just the right size to eliminate almost all wobble in the platen. The long plates help hold everything together. The 32x32-post baseplate is not shown.

Parts:
  • 216 2x4 bricks
  • 28 2x2 bricks
  • 2 1x2 bricks
  • 13 1x6 bricks
  • 14 2x2 inverted sloped bricks
  • 2 2x4 plates (black)
  • 16 2x8 plates (black)
  • 6 1x2x1 panels (yellow spacer)
  • 1 32x32 baseplate
-j
Last edited by jgreely on 07 Apr 2011, 19:37, edited 1 time in total.
jgreely

Re: Lego-based single-camera paperback build

Post by jgreely »

Scan from a 4x6 novel, batch-processed with Adobe Camera Raw. Finereader was able to OCR this 36-page short story with less than one single-character error per page (and about a quarter of those were always getting one particular character wrong). Calculated DPI is 542, which is plenty, even if some pages need deskewing.

Image

Full-resolution detail:

Image

I'm not using the remote-control software yet, and I might not. Since the exposure and focus are constant, and the camera support is rock-solid, I might as well just shoot with the cable release, and then carry the CompactFlash card over to the computer when I finish a book.

I averaged about six pages/minute for this first batch. To speed that up, I need a finger cot or glove to turn pages more reliably, and some way to keep the backing sheet from slipping out when I pull the book out of the scanner. And practice.

-j
the.traveller
Posts: 82
Joined: 22 Sep 2010, 03:58
E-book readers owned: Samsung Tab S
Number of books owned: 800
Country: Netherlands
Location: Rotterdam, Netherlands

Re: Lego-based single-camera paperback build

Post by the.traveller »

Is using a slightly smaller black sheet than the book your scanning an option. I think it will be easier to handle and it won't stuck inside the build when you take the book out for page turning.

In my country I go to the bookstore and buy a sheet of black paper in the size of app 3 foot by 3. I cut it to different sizes of the books I intend to scan. Or do 1 size for 1 book. So in this case I can have several sheets stuck in the book so I only need to remove 1 black sheet each time after scanning the page. Especially with paperbacks this can be usefull.

Oh by the way,you have a wiki page.

http://diybookscanner.org/wiki/index.ph ... k_build%20| Lego-based single-camera build for paperbacks
jgreely

Re: Lego-based single-camera paperback build

Post by jgreely »

the.traveller wrote:Is using a slightly smaller black sheet than the book your scanning an option. I think it will be easier to handle and it won't stuck inside the build when you take the book out for page turning.
I found that to be slower, due to the tight binding on brand-new paperbacks. What I did instead was have the backing sheet sticking out on only one side, and put a second sheet on top of the platen to mask off the area outside the page.
So in this case I can have several sheets stuck in the book so I only need to remove 1 black sheet each time after scanning the page.
I've done this a few times as well; it's particularly useful when I'm scanning just a few short stories out of a book.
Oh by the way,you have a wiki page.
Thanks.

-j
Post Reply